


Intrusive luxation
Intrusive luxation
Intrusive luxation or intrusion is the displacement of a tooth axially into the socket and owing to wedging expansion of the socket, is almost always associated with dento-alveolar fracture(s).
Clinical findings
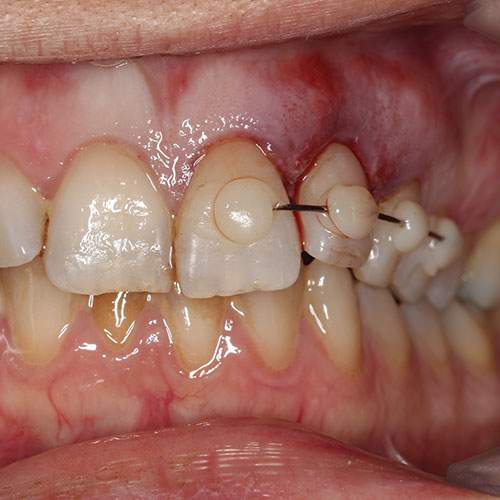
The incisal edge of the intruded tooth is more apical compared to adjacent teeth (giving the appearance of a fractured tooth with a resultant ‘short clinical crown’)
When the tooth is driven into the socket there may be disruption of the gingival margins
The tooth will be firm and locked in position
If you tap the tooth (although there is little value in doing this) there would be a high, metallic or ankylotic sound.
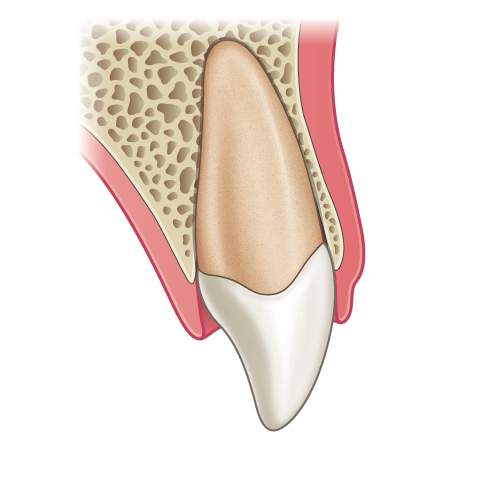
Illustration: Longitudinal section of a tooth showing an intrusive luxation injury.
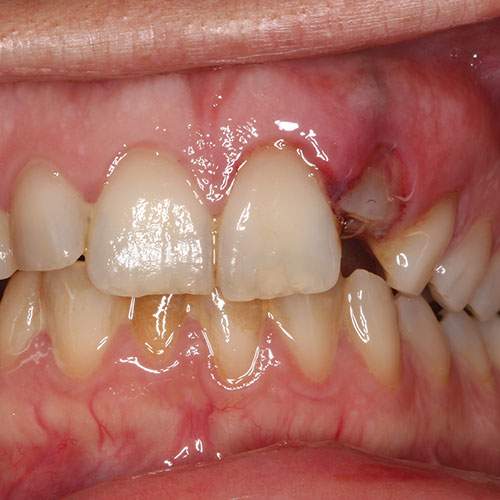
Clinical image: Labial view showing intrusion of UL2 with resultant ‘short clinical crown.
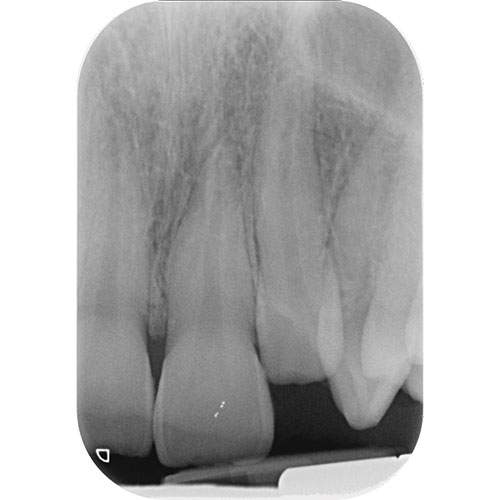
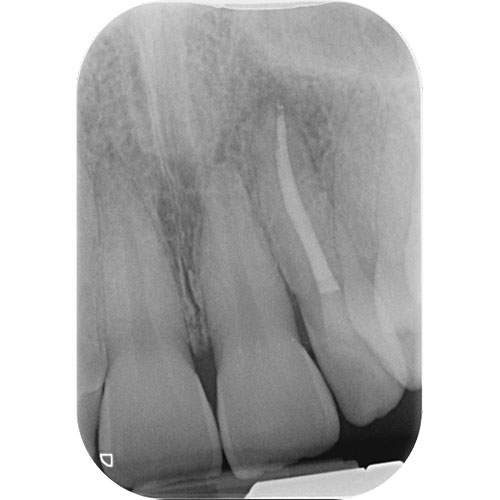
Radiograph: UL2 at presentation showing intact crown and obvious intrusion of the tooth.
Radiographic findings
Radiographs will show:
Loss of the periodontal ligament space around the root of the intruded tooth
Changes in the expected position of the cemento-enamel junction (CEJ) in relation to the adjacent teeth and crestal bone (see radiograph below).

If the intrusion is not obvious it is helpful to compare the position of the CEJ of the injured tooth with the adjacent tooth. If the CEJ of the traumatised tooth is more apical compared to the non-injured tooth then intrusion is the likely diagnosis.
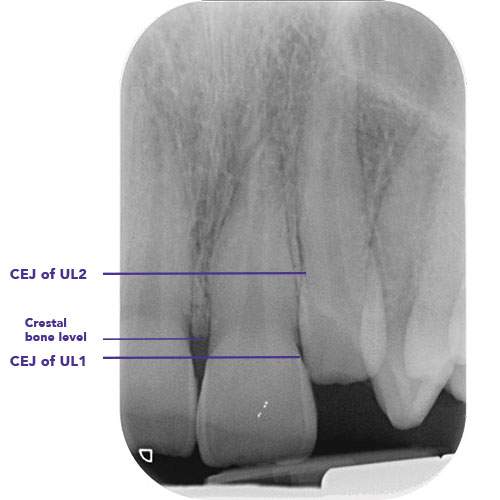
Radiograph: Assessing the position of the CEJ relative to the crestal bone of the injured and non-injured teeth can help with the diagnosis.
Management of primary teeth
If the apex of the primary tooth is displaced towards or through the labial bone plate – leave the tooth to resolve spontaneously
If the apex is displaced into the developing permanent tooth germ, then extraction of the primary tooth should be considered. Extraction may be under local anaesthetic or if this is not possible refer to a maxillofacial unit for extraction under GA.
Management of permanent teeth
Immature teeth with open apices (mild intrusions up to 3mm)
Monitor the tooth for a few weeks for spontaneous eruption
If no improvement is seen in the tooth position then digital repositioning (also called surgical repositioning) is recommended before ankylosis develops.
Mature teeth with closed apices (mild intrusions up to 3mm)
Digital (surgical) repositioning is recommended under local anaesthetic.
Severe intrusions (>7 mm for immature root formation, 3-7 mm for mature root formation)
Digital (surgical) repositioning under LA (or GA in extreme cases) should always be undertaken as the first line of treatment
Soft diet for two weeks
Normal tooth brushing as soon as possible (diluted chlorhexidine mouthwash for a few days if needed)
Monitor pulp for healing and a follow up period of 5 years is advised
Tooth discolouration soon after the injury may be transient. Patients should therefore be reassured and no diagnosis of necrosis made in the absence of any other signs or symptoms (particularly within the first three months after the injury)
The pulp is likely to become necrotic in a tooth with complete root formation and root canal treatment should be carried out if there are signs or symptoms of necrosis.
“Digital repositioning is often referred to as surgical repositioning but since the procedure does not involve surgery, the preferred term is digital repositioning to stress the importance of keeping any further trauma to the tooth to a minimum.
Disimpact the tooth by applying gentle forces with a flat plastic interproximally as seen in the video below.”
– Ms Serpil Djemal
Splinting
IS IT NECESSARY?
Yes splinting is necessary for cases of intrusive luxation.
Splint the tooth temporarily while you ensure with a radiograph that the tooth has been repositioned into the correct position.
Then apply a flexible splint.
SPLINTING TIME
The recommended time for splinting in intrusive luxation is 4 weeks.
WHAT MATERIALS TO USE?
Several different materials are available for splinting a 0.016″ stainless steel orthodontic wire with composite resin.
This should be extended to one uninjured tooth on either side of the injured teeth.
“If you are dealing with multiple intruded teeth, start on one side with the tooth closest to an untraumatized tooth. Once that has been repositioned and temporarily secured in place move to the next tooth until all the teeth are back in the correct position.”
– Ms Serpil Djemal
Clinical image: Labial view of repositioned and splinted intruded UL2.
Radiograph: Showing root-filled UL2 following intrusion injury.
Monitoring: The pulpal response should be monitored at subsequent appointments and a follow-up period of 5 years is advised.
Root canal treatment should be carried out if there are any signs or symptoms of necrosis.